Hello everyone, Today I have a little DIY for you. My fabulous mum made a lot of baby clothes for little Miss Love, and I have been sewing a lot myself lately too, almost only for the decoration of the nursery (which I will be showing you soon, when I think that it is almost finished). Another thing that I have been doing during my maternity leave with my friend Stephanie is "pimping" some plain, white baby outfits I bought from C&A for instance. The first one I want to show you uses the stencil printing technique. Stenciling is a very fun and easy technique for customising boring fabric.
Here is what you will need:
- strong paper and a permanent marker, or stencil pattern
- craft knife
- fabric paint (mine is a Javana Textil)
- small plate (for the paint)
- sponge
- washi tape
 1. Choose an existing design or design your own stencil with a permanent marker. I found my little cloud in the book simple sewing for baby by fabric designer Lotta Jansdotter
2. Using a craft knife and a cutting mat, cut out your design.
3. Pour some of your fabric paint onto a small plate and have your sponge ready.
1. Choose an existing design or design your own stencil with a permanent marker. I found my little cloud in the book simple sewing for baby by fabric designer Lotta Jansdotter
2. Using a craft knife and a cutting mat, cut out your design.
3. Pour some of your fabric paint onto a small plate and have your sponge ready.

4. Protect the other layers with another piece of fabric. 5. Place your stencil on top of your fabric and secure it on the sides with some washi-tape, so it will not move when you are printing. 6. Using the sponge, apply an even amount of paint through your stencil. 7. Let the paint dry a little bit before removing the stencil. Fix the paint after drying by intense ironing (5 min. cotton setting). Cover fabric with a cloth. Thereafter your fabric will be washable.
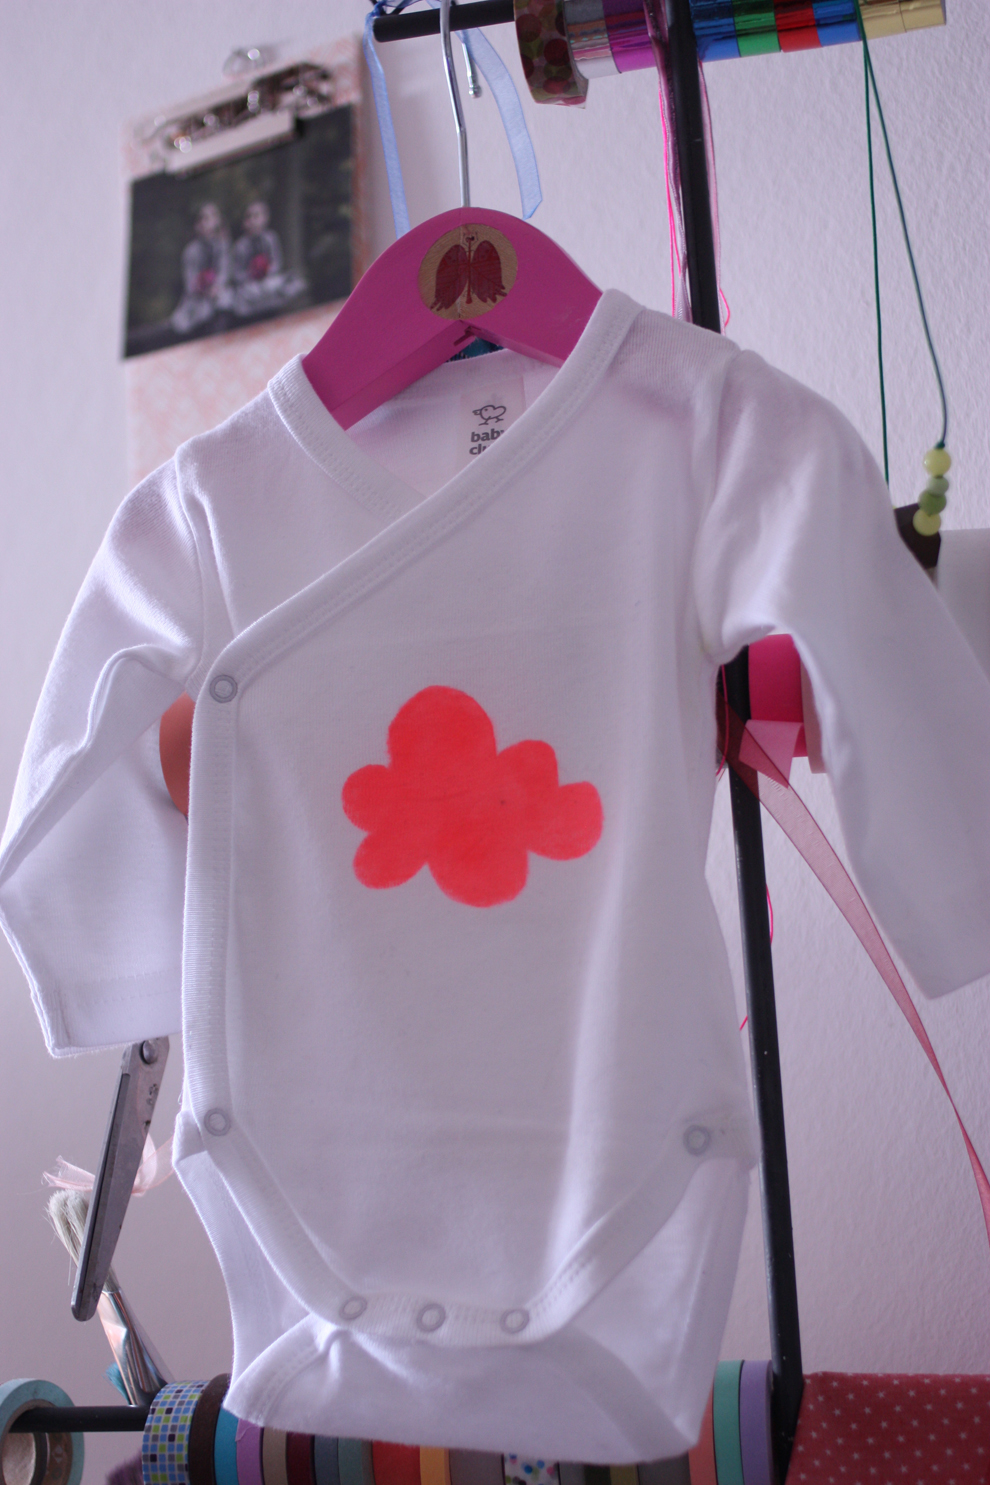
Here is the result:
I wish you a great day! xxx
Elodie