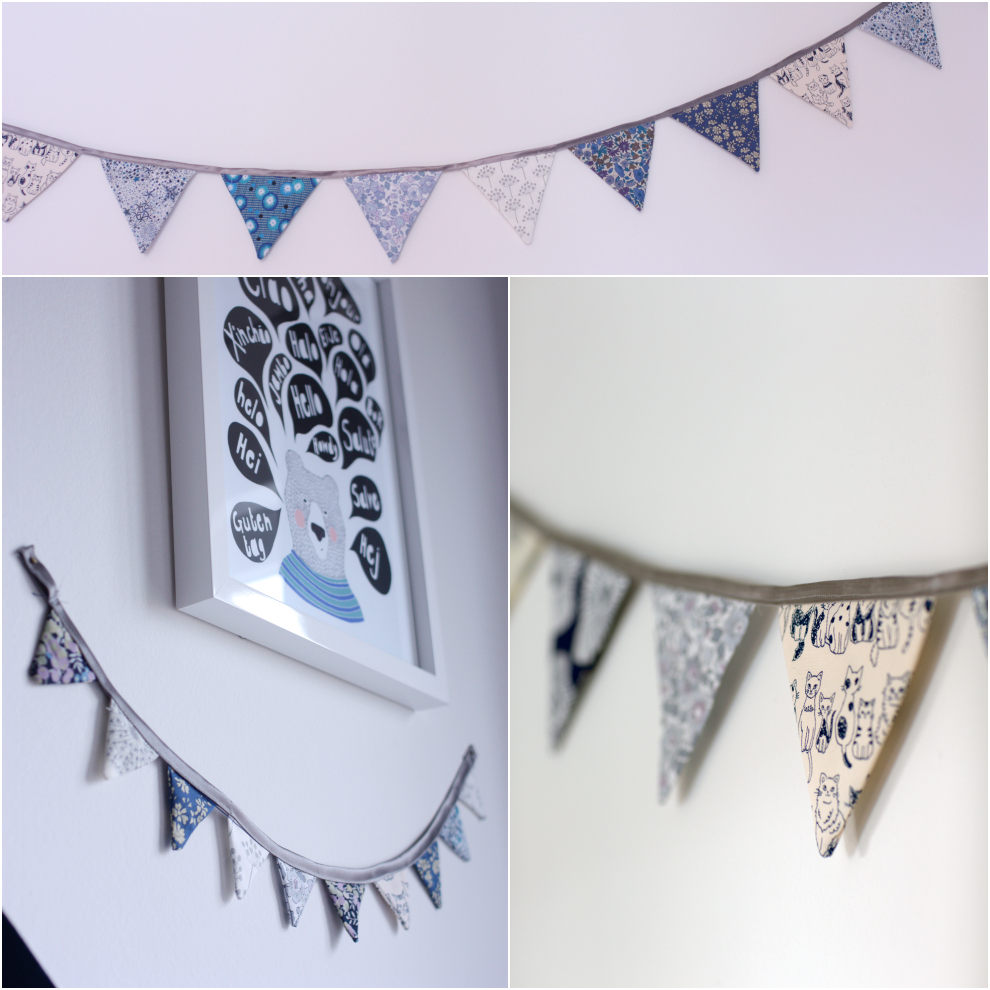
Hello everyone, As promised when I showed you the pictures of the nursery, here is a little tutorial for the big and the mini pennant banner I made for baby love.
So here you go! It is a very simple project that will not take you more than an evening or a week-end to complete and that is suitable for beginners. I also made a mini-version of the pennant banner. You just have to use the smaller triangle and a smaller portion of bias tape. I made some pictures to illustrate the steps of the tutorial and a pattern to download:
Items needed for a two-metre pennant banner:
You will need:
- the pattern (see above)
- 32 fabric triangles (for 16 triangles). It is good to use leftover fabric pieces from other projects. You don't need 16 different fabrics - just be careful not to put the same pattern next to each other when you assemble the garland
- 2.5 metre bias tape.
- assorted thread (same colour as the bias tape)
- a cutting mat and a rotary cutter (or some fabric scissors)
- masking tape
- a sewing machine
- pins
- iron and ironing board
- 2 curtain rings to attach the banner to the wall.
Step 1: download the pattern, print it and cut it out. Place the pattern on your fabric on the cutting mat and fix it with masking tape. Step 2: cut your fabric. Always cut at least two of each pattern for both sides of your triangles. Step 3 - 4 : place your triangles' right sides against each other and sew them along the two longer edges.
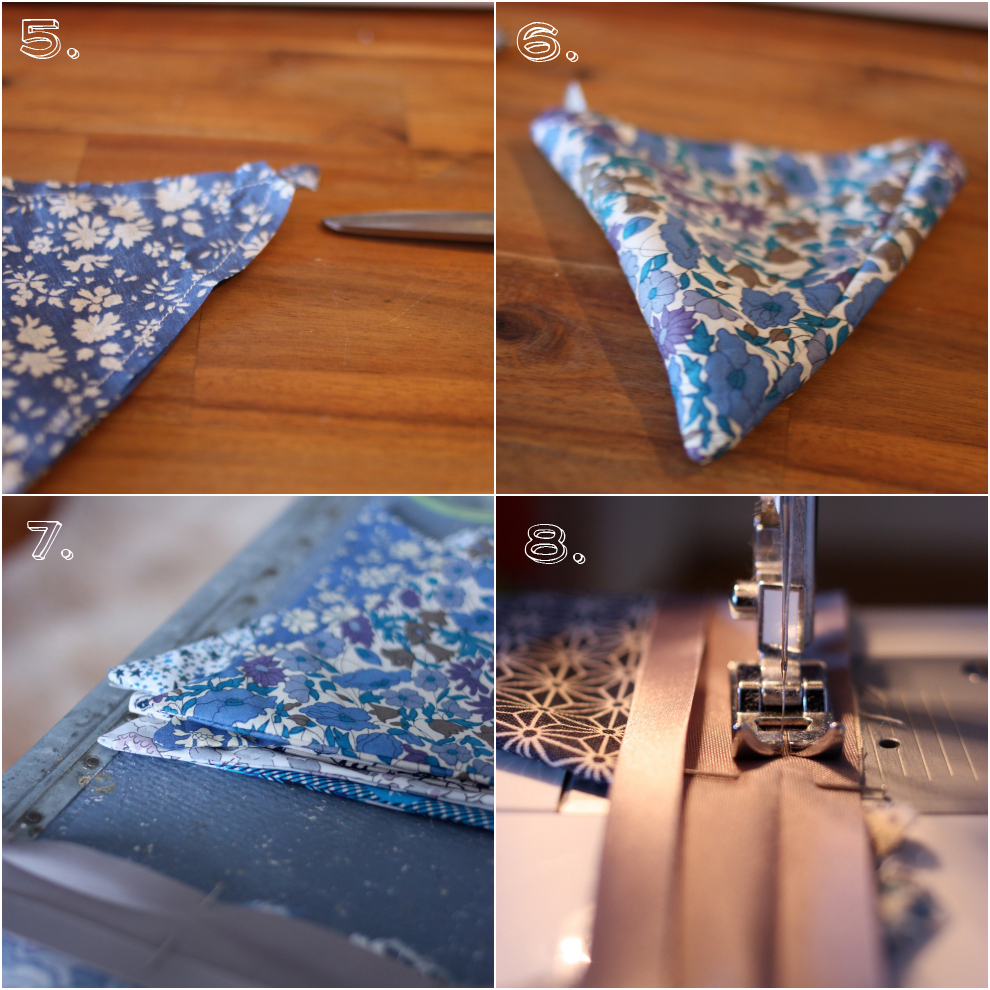
Step 5: cut the point of each triangle with a pair of fabric scissors. Step 6: return your fabric on the right side. Step 7: iron your triangles flat. Step 8: iron one side of your bias tape flat and pin your triangles (2 to 3 pins per triangle) next to each other. Be careful when you assemble the banner not to put the same pattern next to each other and to have a harmonious succession of fabric. Sew on the fold of your bias tape. Leave at least 8 cm of tape on each side, so as to be able to attach your banner to the wall. Take away your pins.
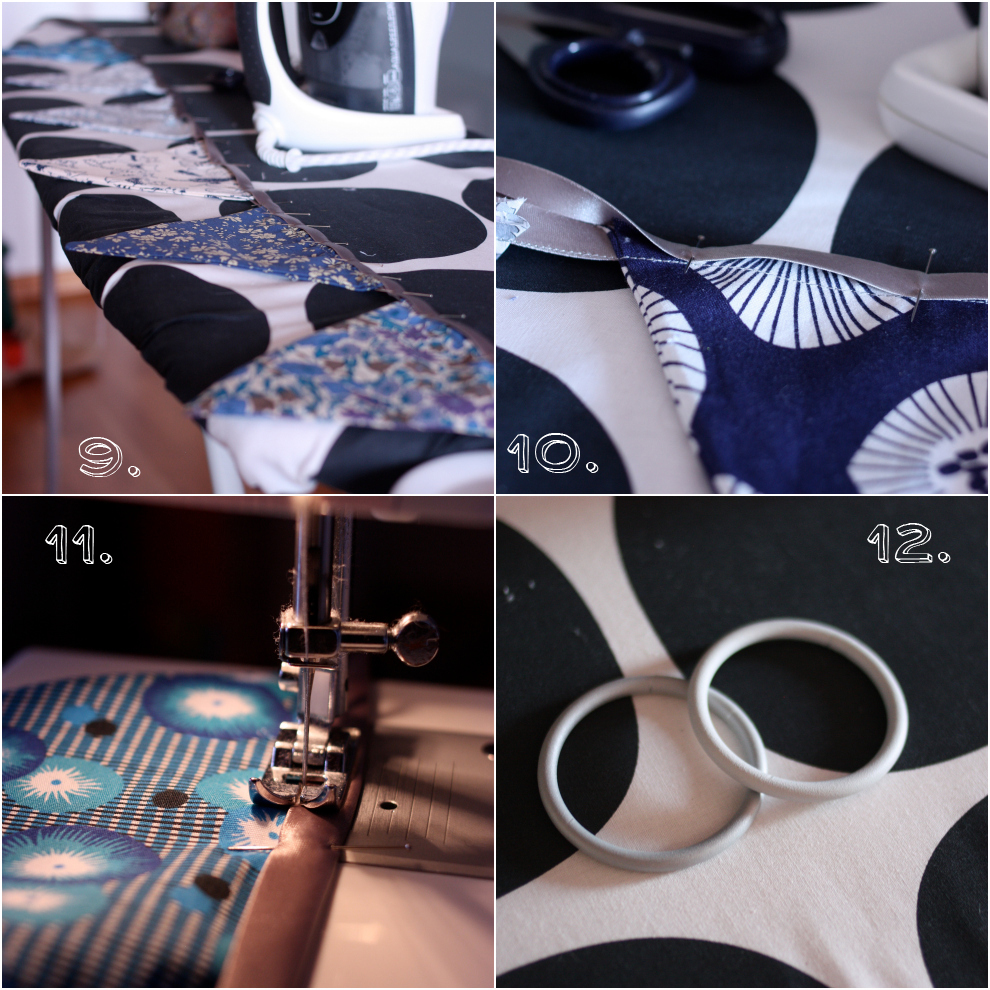
Step 9 - 10: with the help of your iron, fold your bias tape and pin it in place. Step 11: sew your bias tape as close to the edge as possible - backstitch at the end. Step 12: attach the rings at each sides of the banner, and fix it to wall with simple nails.
Voila!
Take care and talk to you soon! (I really hope this time after the birth...)
Elodie


